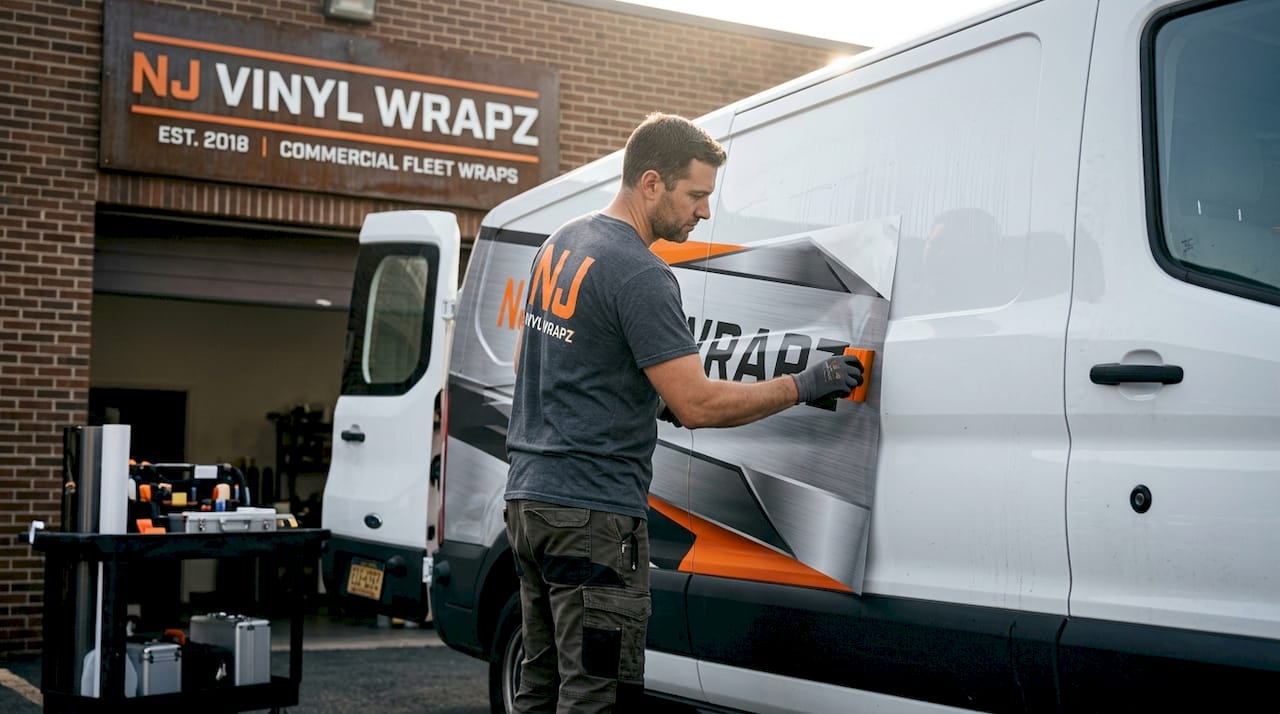
Your work van rolls through dozens of neighborhoods every single day. That means every day you skip a proper vehicle wrap, you are leaving thousands of potential customers without a reason to remember your business. According to the Vehicle Wrap Cost Guide, vehicle wraps can generate 30,000 to 70,000 daily impressions, making a wrapped van one of the most cost-effective advertising tools available to New Jersey business owners. This guide walks you through everything you need to know: from gathering materials and navigating local regulations to applying the vinyl correctly and avoiding the mistakes that kill most DIY wrap jobs before the first mile.
Table of Contents
- What you need before wrapping a van
- Choosing the right vinyl and tools for your van wrap
- Step-by-step: How to wrap your van for professional results
- Troubleshooting and maximizing your wrap’s impact
- The expert truth about DIY vs. professional van wraps in NJ
- Take the next step with professional van wraps in New Jersey
- Frequently asked questions
Key Takeaways
| Point | Details |
|---|---|
| High-impact fleet marketing | A single wrapped van in NJ can generate up to 70,000 daily impressions with the right design. |
| Preparation is crucial | Proper surface prep and legal compliance avoid costly mistakes and re-dos. |
| Use premium materials | Top-quality vinyl films and air-release features make installation smoother and wraps last longer. |
| Expert help can pay off | Professional installers help you navigate complex vehicle shapes and strict local regulations. |
What you need before wrapping a van
Knowing the business value of van wraps is motivating, but the real work starts with preparation. The difference between a wrap that lasts six years and one that peels at the corners after six months comes down almost entirely to what you do before the vinyl ever touches your vehicle.
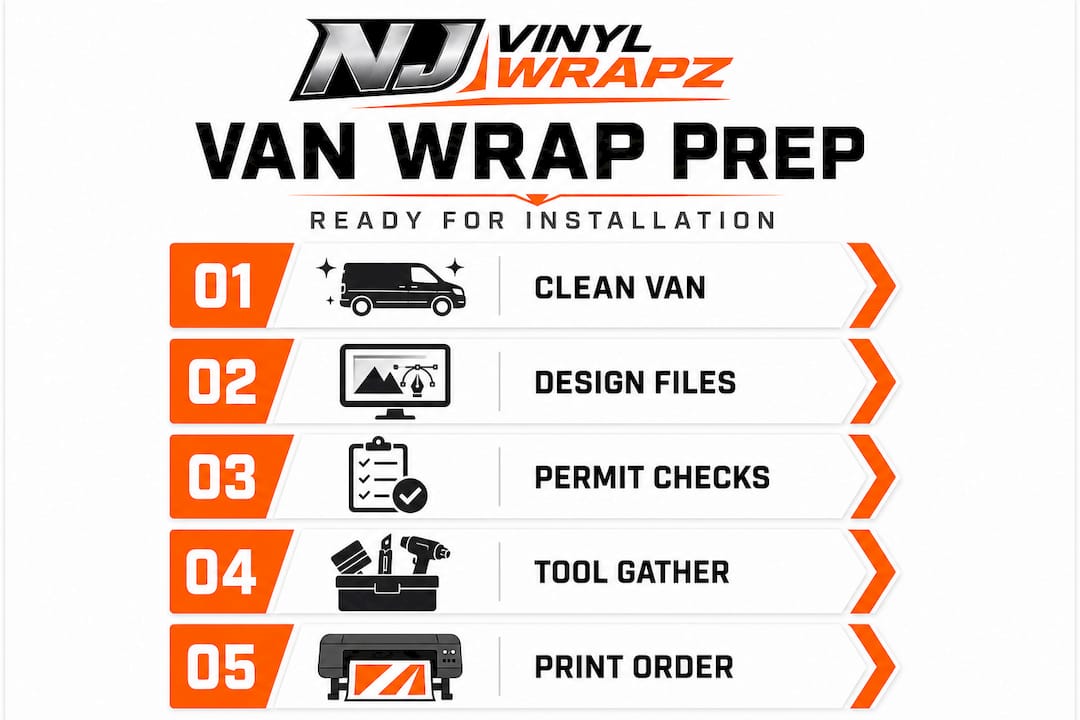
Materials and tools checklist
Here is a breakdown of what a proper van wrap project requires:
| Category | Item | Purpose |
|---|---|---|
| Vinyl | Cast wrap film (3M or Avery) | Conforms to curves and recesses |
| Cleaning | Isopropyl alcohol (70%+) | Removes oils and residue |
| Cleaning | Tack cloth or lint-free towels | Final surface wipe before application |
| Application | Felt-edge squeegee | Smooth vinyl without scratching |
| Application | Heat gun or torch | Stretch vinyl around edges and curves |
| Application | Slip solution | Reposition vinyl during install |
| Cutting | Precision knife and spare blades | Trim edges cleanly |
| Design | Print-ready files (300 DPI, CMYK) | Accurate color reproduction |
Beyond these physical tools, your design files need to be production-ready before you place a print order. Low-resolution logos, wrong color profiles, or files without bleed areas will result in wasted material and costly reprints. Review the NJ commercial wrap design steps to make sure your artwork is set up correctly before you commit to printing.
Legal considerations for NJ businesses
New Jersey has localized zoning rules that commercial vehicle owners need to know. The New Jersey Meadowlands Commission, for example, requires that zoning certificates may be required for vehicle signage unless a specific exemption applies. If your fleet operates in or around regulated districts, skipping this step can result in fines or forced removal of your graphics.
Not every municipality enforces this equally, but fleet managers operating across multiple NJ counties should verify requirements in each area they regularly park or operate. Contact your local zoning office or check with a local wrap shop before committing to specific messaging that could trigger a compliance issue. Explore your commercial vinyl services options to ensure the design and installation approach aligns with what’s legally acceptable in your area.
Pro Tip: Pull permits and zoning approvals before finalizing your design. Changing required text or removing a phone number after printing costs money and delays your launch.
Choosing the right vinyl and tools for your van wrap
With your checklist and regulatory items squared away, it is time to select the specific wrap film and application tools for a smooth installation. Not all vinyl is the same, and choosing the wrong material for a full-size cargo van is one of the most expensive mistakes fleet managers make.
Cast vs. calendared vs. specialty vinyl
| Vinyl Type | Thickness | Conformability | Best For | Lifespan |
|---|---|---|---|---|
| Cast | Thinner (2 mil) | Excellent | Full wraps, complex curves | 7+ years |
| Calendared | Thicker (3.5 mil) | Limited | Flat panels, short-term decals | 3–5 years |
| Specialty | Varies | Good to excellent | Color change, chrome, matte | 4–7 years |
Cast vinyl is made by pouring a liquid formula onto a casting sheet and curing it, which results in a film with a memory that allows it to conform tightly to curved surfaces, rivets, and door handles without lifting. Calendared vinyl is made by running vinyl through rollers under pressure, making it stiffer and more prone to shrinking over time. Premium cast wrap films outperform lower-grade vinyls for shaping and longevity, and
For a full-size van with sliding doors, wheel arches, and body creases, cast vinyl with air-release channels is the only practical choice if you want the wrap to look clean and last. Explore the full range of NJ van wrap options to compare material grades before making your final decision.
Essential hand tools for van wrap installation
- Felt squeegee: Moves vinyl forward without scratching the printed surface; replace the felt when it feels rough.
- Hard card squeegee: Used for tight corner work and edge pressing.
- Heat gun (dual temperature): Low setting for repositioning; high setting for post-heat stretching around curves.
- Knifeless tape: Allows clean cuts along panel edges without a blade touching the paint, reducing the risk of clear coat damage.
- Rivet brush: Specifically shaped to work vinyl down into riveted surfaces on cargo vans.
- Spray bottle with slip solution: Usually a few drops of dish soap in water; extends your repositioning window during initial placement.
Pro Tip: Always have at least two squeegees on hand during a full van wrap. You will switch between the felt-edge and the hard card dozens of times, and stopping mid-panel to find a tool can cause premature adhesion you cannot reverse cleanly.
Understanding why commercial wraps boost NJ fleet marketing also helps you justify the higher upfront cost of quality materials to company decision-makers. The cost difference between cast and calendared vinyl is often less than $200 on a full van, while the lifespan difference can be two to three years of additional advertising value.
Step-by-step: How to wrap your van for professional results
Armed with the right materials, let’s walk through the van wrapping process step by step with special attention to the spots where most installations fail.
-
Wash the vehicle thoroughly. Use a degreaser to strip wax, road film, and silicone. Pay extra attention to door jambs, mirror mounts, and the underside of body panels where grease accumulates.
-
Wipe down with isopropyl alcohol. After washing, wipe every surface that will receive vinyl using a 70% isopropyl solution and lint-free cloths. Any remaining oil creates a weak bond layer under the adhesive.
-
Remove exterior trim pieces where possible. Mirrors, door handles, and antenna bases are easier to wrap around if removed beforehand. It looks cleaner, too.
-
Measure and cut panels. Cut each vinyl panel with at least two to three inches of overlap on every edge. Do not try to cut exact sizes at the printing stage, because slight positioning shifts during install will leave gaps.
-
Apply slip solution and position the vinyl. Spray the panel lightly before laying the vinyl down. This gives you a short window to reposition without the adhesive grabbing permanently.
-
Squeegee from the center outward. Work from the center of each panel toward the edges using a felt squeegee at a 45-degree angle. This pushes air out instead of trapping it beneath the film.
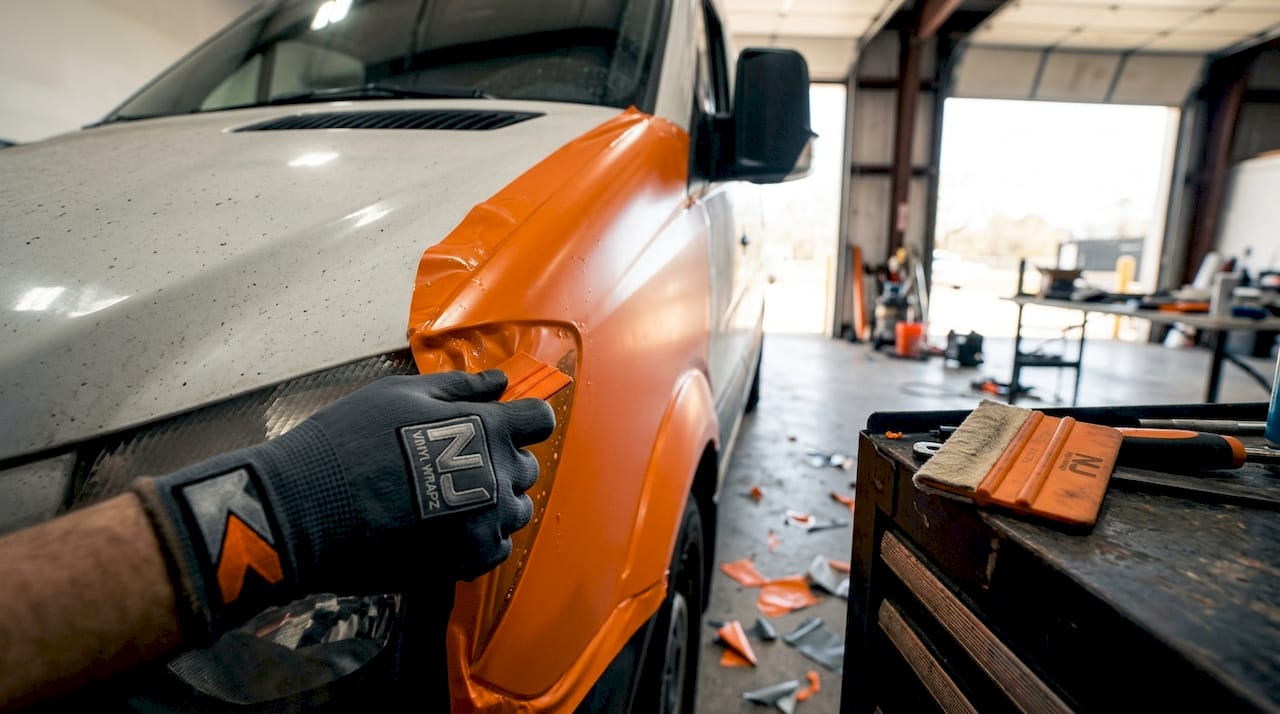
-
Apply heat and stretch around curves. Use your heat gun to warm the vinyl just above body temperature before wrapping it around recesses, door handles, and corners. Do not stretch cold vinyl.
-
Trim edges with a precision knife or knifeless tape. Cut along panel edges, door jambs, and body lines. Leave about one centimeter of material to wrap around the edge rather than cutting flush.
-
Wrap and seal all edges. Fold overlapping material around every exposed edge and press firmly with a hard card squeegee. This is where most DIY wrap failures begin, specifically at deep recesses and along unsealed edges.
-
Post-heat the entire vehicle. Use your heat gun to pass over the completed wrap at a consistent distance of about four to six inches. This activates the adhesive fully and locks the vinyl into contoured surfaces.
A word of caution: Temperature matters more than most beginners realize. Installing vinyl in direct sunlight or in temperatures below 50°F causes adhesion failures that often do not show up until weeks later. Always wrap indoors, preferably in a climate-controlled space. This is the same reason professional shops install wraps in temperature-regulated bays.
Review the detailed custom wrap installation guide for additional guidance on fleet-specific panel layouts and common configuration challenges by van model.
Troubleshooting and maximizing your wrap’s impact
Completing the wrap is just the start. Knowing how to maintain it and avoid regulatory issues ensures your NJ business gets the full return on this investment.
Common problems and how to prevent them
- Peeling corners: Usually caused by skipping the edge-fold step or inadequate post-heating. Fix minor lifts with a heat gun and hard card squeegee. If the corner continues to lift, use a small amount of vinyl edge sealer.
- Air bubbles: Tiny bubbles that appear after installation usually disappear within 24 to 48 hours in warm weather. Larger bubbles indicate a trapped contaminant beneath the film; these require lifting and re-applying that section.
- Fading and discoloration: Prolonged exposure to NJ’s summer UV index degrades lower-grade films fastest. Cast vinyl with UV-protective overlaminate holds color significantly longer.
- Accidental regulatory violations: Operating wrapped vehicles with specific messaging in zones that require a zoning certificate can result in fines. Zoning certificates may be required for signage in certain NJ districts, so confirm compliance before your fleet goes live.
Pro Tip: Do a full visual inspection of your wrap every 90 days. Catching a corner lift or a small tear early costs almost nothing to fix. Ignoring it for six months means replacing an entire panel.
Maximizing your visual impressions
Your NJ fleet wrap is only as effective as the design placement and readability. Put your business name and phone number on the largest flat surfaces: the sides and rear. Keep the message to three elements maximum, which is your company name, one service descriptor, and contact information. Drivers have about three seconds to absorb your message at a stoplight.
According to the Vehicle Wrap Cost Guide, NJ fleet wraps can generate up to 70,000 daily impressions. That number is only achievable when the message is legible and the wrap is in good visual condition. A faded or peeling wrap damages brand perception rather than building it. Read our guide on protecting and maintaining wraps for a full maintenance schedule.
The expert truth about DIY vs. professional van wraps in NJ
Here is the part most wrap guides skip: knowing how to wrap a van and being in the right position to do it well are two different things. We have seen it repeatedly over more than a decade of fleet wrapping in New Jersey.
The majority of failed wraps we inspect did not fail because the person lacked instructions. They failed because of conditions that were invisible at the time of installation. A shop that was too cold. A panel that still had a trace of wax from the last car wash. A recess that was not post-heated adequately on a complex door panel. Edge failures and prep issues top the list of DIY headaches, and these are exactly where experienced professionals focus the most attention.
For a single cargo van with flat panels and minimal curves, a skilled DIYer with the right materials can get a solid result. But if you are managing a fleet of five or more vans on a tight schedule, or if your vehicles have complex body lines, or if you are operating in NJ regulatory zones where a compliance error carries financial consequences, professional installation is the smarter investment. The cost difference between a DIY job gone wrong (reprint fees, extra vinyl, lost time) and a professionally done wrap that goes on correctly the first time is smaller than most fleet managers expect.
There is also the consistency issue. Customers who see your fleet across multiple vehicles need to see identical branding. Minor color shifts between panels or inconsistent placement looks unprofessional even if each individual van looks acceptable in isolation. A professional shop maintains color calibration across print runs and installation batches, which is something a DIY operation cannot easily replicate.
Explore the fleet wrap installation wisdom from our team to understand what a professional process actually looks like and how it compares to a solo installation.
Take the next step with professional van wraps in New Jersey
Whether you are ready to try a wrap yourself or want someone to handle it from design to installation, working with a local NJ team means faster turnaround, better compliance awareness, and wraps built to perform in real Northeast conditions.
At NJ Vinyl Wrapz, we offer full van wrap services for businesses that want maximum coverage, partial van wraps for cost-effective branding on a budget, and complete NJ fleet wrap packages for companies managing multiple vehicles. Our installations happen in climate-controlled bays using 3M and Avery materials, and we handle zoning and compliance guidance as part of the process. Reach out today for a quote and see why NJ businesses trust us to keep their fleets looking sharp on every road in the state.
Frequently asked questions
How long does a van wrap usually last in New Jersey?
With premium materials and proper care, a van wrap typically lasts 4 to 7 years depending on sun exposure, washing habits, and whether it was installed on properly prepped paint.
Are there design or color restrictions for van wraps in NJ municipalities?
Some areas require zoning approval for vehicle graphics used for commercial advertising. As noted in the NJMC zoning rules, a zoning certificate may be required for signage unless a specific exemption applies, so always check local ordinances before installation.
Can a van wrap be removed without damaging the paint?
Yes. When installed over clean, properly cured paint and removed correctly using heat and the right technique, quality cast vinyl wraps protect the paint beneath rather than damage it.
What’s the average cost for wrapping a work van in NJ?
Costs vary by van size, material grade, and coverage level, but according to the Vehicle Wrap Cost Guide, most full van wraps range between $2,000 and $4,500 for professional-quality results.
Recommended
- Step-by-step commercial wrap design for NJ fleet success | NJ Vinyl Wrapz
- Custom wrap installation guide: Maximize fleet branding in NJ | NJ Vinyl Wrapz
- Decal installation: A complete guide for NJ fleets | NJ Vinyl Wrapz
- Wrap Options | Vehicle Lettering, Partial & Full Wraps | NJ Vinyl Wrapz | NJ Vinyl Wrapz